Some of the most powerful exercises help to reduce the risk of accidents resulting from poor balance. Exercises aimed at balance stop unexpected falls. For all of us to avoid damage, they are crucial; yet, they are especially beneficial for older persons, those with a head trauma or accident, an inner ear infection, or those who have just undergone surgery. Simple activities include standing up, sitting down, walking, standing on uneven ground surfaces, or turning over can become difficult without appropriate balance without tripping over and falling. Doing balancing exercises is therefore rather crucial.
Start with 20 minutes of daily balancing exercises and follow your physical therapist's recommended schedule if one exists. Starting from the neck, work your way to the torso and ultimately the lower extremities. Make sure your regular workout routine includes one-leg balancing drills.
Balancing requires time and effort. The degree of your illness or damage will determine how quickly your balance improves—a few weeks to many months. Be patient; soon you will begin to feel better and go about your activities free from help.
Exercises for Best Balance You Should Try at Home
Your general health and well-being will much improve if you include stability training and balancing exercises in your workout program. You should be aware, before beginning, that balancing exercises should always be performed in succession. Nobody can do all balances perfectly right away; they need time and practice, particularly if you are healing from an injury. Furthermore important for injury prevention and recovery are core strength, proprioception, and flexibility, which these workouts concentrate on increasing.
First let us begin with the two types of balancing exercises: dynamic and static. While dynamic balance exercises move through a position while preserving equilibrium, static balance exercises entail keeping a posture. You can begin strength training to fully recuperate if you are sure you could easily finish workouts of both types. Before beginning weight bearing strength workouts, you must make sure you have good balance. Let's start right now without delay!
Techniques to Improve Static Balance
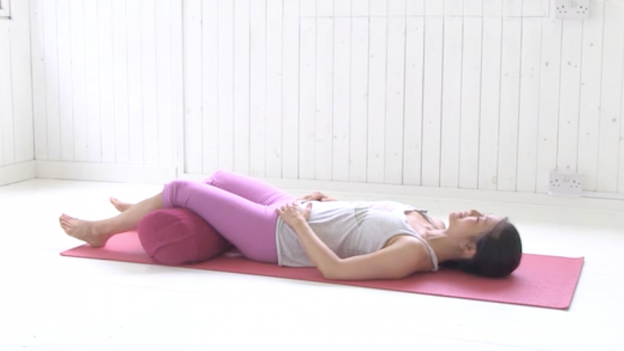
1. Supine On Mat Or Bed
How To Get Started
-
Get down on your bed or a mat. Using your hands around your shins or behind your thighs, flex your knees and pull them near your chest.
-
Roll over to your right, hold for two seconds, then roll back to where you started.
-
Roll over to your left; hold for two seconds; then roll back to the starting point.
Note: Should you be recuperating from knee surgery, avoid this workout.
Two sets of five repetitions makes sets and reps.
2. 4-Point Stance Using Mat or Bed
How To Behave
-
Lay on a mat or your bed.
-
Turn over to your right and settle into a prone posture on your stomach.
-
Clench your fists, bend your elbows and knees, then raise your upper body using arm power then your torso.
-
Drop on your hands and knees. Check that your hands are under your shoulders, your knees under your hips, your back is flat, your shoulders are down, and your abdominals are drawn in. Ten seconds in this posture.
-
Slink gently down your torso to adopt a resting position.
-
Should you are comfortable, repeat one more time.
-
Note: While you hold the position for ten seconds, your physical therapist could first help you.
Sets and repetitions: 2–3 sets of 10 seconds' hold
3. 3-Point Stance Using Mat or Bed
How To Execute
-
Get down on your hands and knees—hands under shoulders, knees under hips, shoulders pushing down, back flat.
-
Rising your left leg off the mat, stretch it backwards in line with your hip. Don't allow your lower back arch slink or your hips or shoulders waver. Tensing your abdominals, dragging your shoulders down, and squeezing your glutes can help you to brace your core.
-
Hold this position five to ten seconds.
-
Three sets of three repetitions makes sets and reps.
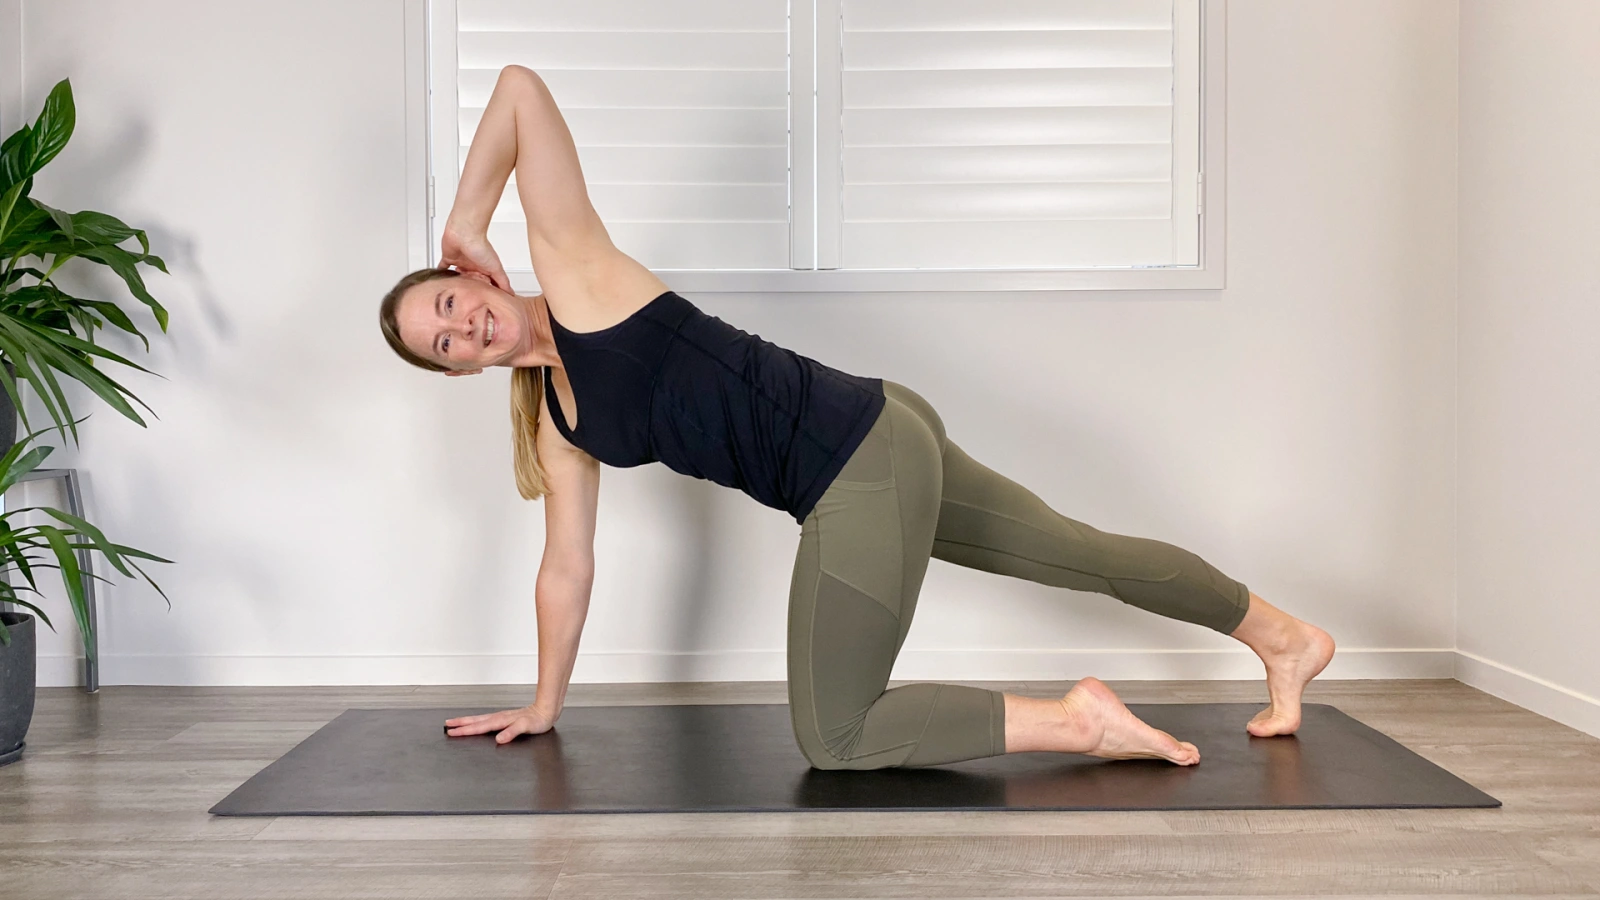
4. 2-Point Stance On Mat Or Bed (Bird Dog)
How To Get Started
-
Get down on your hands and knees—hands under shoulders, knees under hips, shoulders pushing down, back flat.
-
Rising slowly from the mat, stretch your left hand forward in line with your ear. Turn your thumb upward toward the ceiling. Keeping your shoulder down, extend your arm shoulder height.
-
Rising your right knee off the mat, stretch your leg behind your hip. Squeeze your glute, bring your abdominals in, and avoid let your lower back arch.
-
Don't allow your hips, shoulders, or torso slink or waggon. Tensing your abdominals, bringing your shoulders down, and squeezing your glutes can help you to brace your core. To help your shoulder to settle, press down onto the hand on the mat.
-
Hold this position five to ten seconds.
-
Three sets of two repetitions makes sets and reps.
Read Also: Exercises For Women To Lose Back Fat
5. Assisted Kneeling
How To Do
-
Get down on your hands and knees—hands under shoulders, knees under hips, shoulders pushing down, back flat.
-
In front of you your physical therapist will set up a gym ball. Set your right hand on it.
-
Once you feel at ease, gently elevate your body and place your left hand on the ball.
-
Start to knelt.
-
If necessary, your physical therapist will assist with stabilization of your back and shoulders. Lower your shoulders, then activate your back muscles by abing in.
-
Spend twenty seconds in this stance.
-
Sets and repetitions: two sets of three
6. Crawling
Exercise should not be done if you just underwent knee surgery or if you are not permitted to apply any pressure on your knees.
How To Act
-
Get down on your hands and knees (hands under shoulders, knees under hips, shoulders pushing down, back flat). Then, simultaneously, crawl forward and backward by moving opposite hand and knee forward. Don't allow your hips or shoulders rise or shift or your torso waver. Straighten your core. At first, you might require help from your physical therapist.
-
Also crawl sideways, using the opposite hand and arm to preserve the same stability throughout your body.
-
Maintaining your shoulders over your wrists and knees beneath your hips, always move the opposing hand and knee simultaneously.
-
As you advance, steadily widen the distance.
-
Two groups of two to four crawls each directions.
7. Kneeling From Ground to Standing
How To Get Started
-
In front of a stall bar or beside a chair, go down on your hands and knees (hands under shoulders, knees under hips, shoulders pushing down, back flat). Make sure the chair can support your weight and is sturdy enough. Right behind you will be your physical therapist.
-
Holding one of the lower bars one hand after another, position your right foot in front of you and maintain the right knee bent over your ankle. Alternatively place one palm on the chair and start a seated lunge.
-
Get into a standing posture gradually using the strength and help of your physical therapist. Try not to allow your knees roll in or out; stand up by pressing into your feet and utilizing your glues. Maintaining a firm core, stand tall and raise your shoulders.
-
Again, gently drop into the kneeling posture with your physical therapist, ensuring your knees and torso do not shake, and repeat.
-
Two sets of two repetitions is sets and reps.
8. Staying In Between Parallel Bars
How To Act
-
Get on using two parallel bars.
-
One foot forward, keep your shoulders down and core tight, and swing side to side.
-
Do this ten times then swing both forward and backwards.
-
Ten times now, do this.
-
Three sets of three repetitions makes sets and repetitions.
These workouts have to be done for three to four weeks. See your physiotherapist and doctor before moving on to dynamic balancing exercises, the next level. Before moving on to these exercises, be sure you are comfortable with all of the stationary balancing activities and frequent walking.


